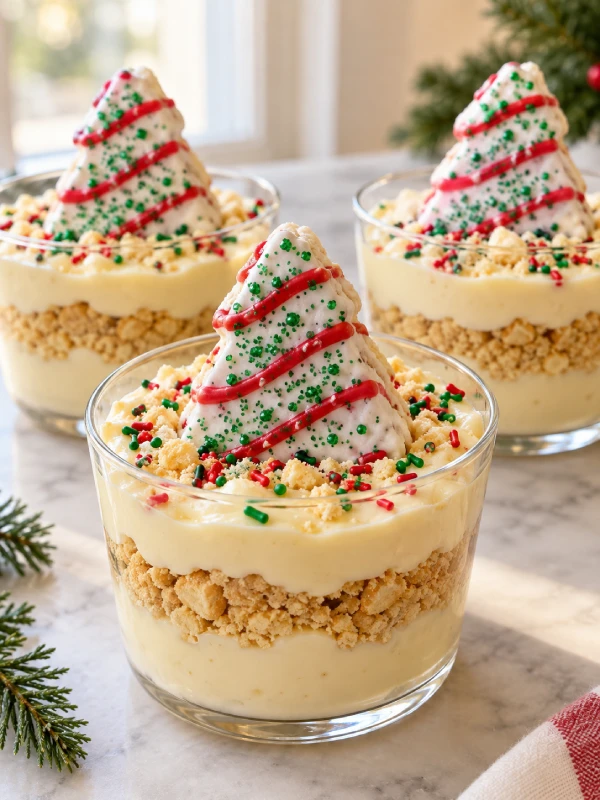
Christmas Tree Cake Dirt Cups combine vanilla pudding, whipped topping, and crushed sandwich cookies in individual cups, each topped with a Christmas tree snack cake. These no-bake treats suit busy holiday hosts and beginner cooks. Simply prepare the filling, layer the cups, chill, and decorate before serving.
Why Make Christmas Tree Cake Dirt Cups?
The Story Behind This Simple Holiday Dessert
Growing up in a big, busy family, I watched my mom turn pantry basics into comforting food in about 30 minutes. Her approach still shapes how I think about holiday entertaining: keep things simple, make them with care, and leave time to enjoy everyone around the table.
I’m Abby Pinkmann, the chef behind EAT WELL, just outside Austin, Texas. These Christmas Tree Cake Dirt Cups fit that same welcoming spirit. Creamy vanilla filling, buttery cookie crumbs, and soft snack cakes bring several textures together without an oven or a complicated decorating project.
Clear cups show off the layers, while white frosting and red-and-green sprinkles give each serving a cheerful Christmas finish. They also let you portion dessert before guests arrive. For a larger holiday spread, our easy cookie recipes offer simple treats to serve alongside them.
Key Takeaways: What You Need to Know
- No baking required: Assemble the dessert with instant pudding, cold milk, thawed whipped topping, cookies, and Christmas tree snack cakes.
- Choose your cookie flavor: Golden sandwich cookies complement the vanilla filling. Chocolate sandwich cookies create darker, more traditional “dirt” layers.
- Keep equipment simple: Grab a bowl, whisk, spatula, and clear serving cups. Crush cookies in a sealed bag if you don’t have a food processor.
- Plan decorations separately: Add the tree cakes and colorful sprinkles shortly before serving to help preserve their appearance.
- Expect changing textures: Cookie crumbs soften as they sit against the pudding, creating a more cake-like layer.
In this Article
What Ingredients and Cups Do You Need?
The Pudding, Cookies, Whipped Topping, and Tree Cakes
For this Christmas Tree Cake Dirt Cups recipe, plan on eight servings. Start with the quantities below, then divide the filling and crumbs evenly. Use the Christmas tree snack cakes as toppers rather than stirring them into the pudding.
| Ingredient | Amount and Purpose |
|---|---|
| Instant vanilla pudding mix | One standard box that calls for 2 cups of milk; forms the creamy base. Package weights vary by brand. |
| Cold dairy milk | 2 cups; hydrates the pudding mix. Whole or 2% milk works for this version. |
| Whipped topping | One 8-ounce tub, thawed in the refrigerator; lightens the pudding filling. |
| Golden sandwich cookies | 24 cookies, including their filling; crush into crumbs for the layers. |
| Little Debbie Christmas Tree Cakes | 8 standard-size vanilla cakes; use one per cup. |
| Christmas sprinkles | About 2 teaspoons, or to taste; adds a colorful finish. |
Which Cookies, Pudding Mix, and Cup Size Work Best?
Golden Oreos keep these vanilla pudding dessert cups light in color, with a sweet cookie contrast. Choose regular chocolate Oreos instead if you prefer darker layers and cocoa flavor. Crush either variety with its cream filling intact.
Use instant pudding, and check the package for a preparation ratio of two cups of milk per box. Cook-and-serve pudding requires a different method. Let the instant pudding thicken before folding in the whipped topping.
Choose eight wide, clear cups with an 8-ounce capacity. You’ll leave some space at the top rather than fill each cup to the rim. A wide opening also gives the cake topper room to sit without squeezing it against the sides.
Keep extra cookies for a separate platter instead of overloading the cups. Our sugar cookie recipe offers another decorating activity, while cake mix cookies suit a holiday menu built around convenient ingredients.
How Do You Make Christmas Tree Cake Dirt Cups?
Christmas Tree Cake Dirt Cups come together in two stages: prepare a thick pudding filling, then layer it with crushed cookies. Fold thawed whipped topping into the set pudding for a lighter texture. Chill the assembled cups, and add the snack cakes and sprinkles just before serving.
Prepare the Pudding Filling and Cookie Crumbs
1. Make the vanilla pudding.
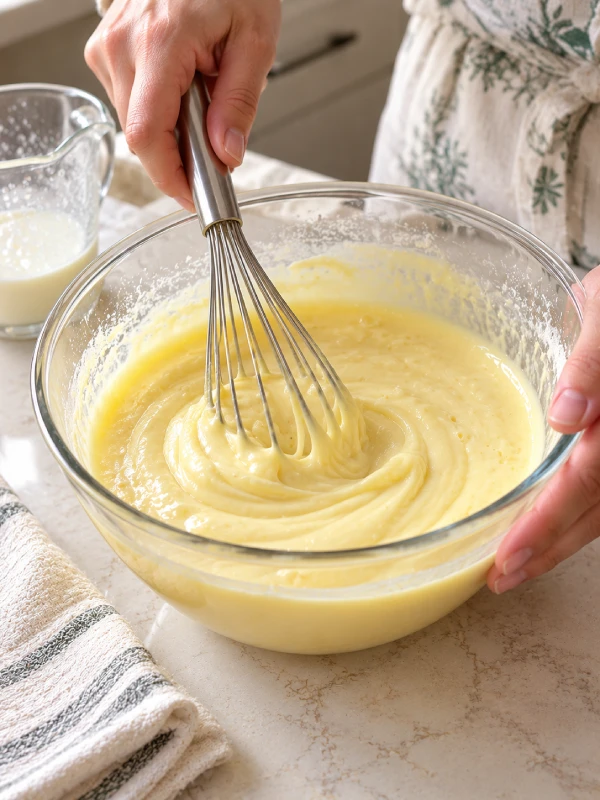
Pour 2 cups of cold milk into a mixing bowl. Add the instant vanilla pudding mix, using the box specified in the ingredient list. Whisk for the time on its package, usually about two minutes, until the mixture looks smooth.
Let the pudding stand for the package’s setting time. It should thicken enough to mound softly on a spoon. If it still pours like milk, check that you chose instant pudding and measured the milk correctly before continuing.
2. Fold in the whipped topping.
Add the 8-ounce tub of refrigerator-thawed whipped topping. Use a spatula to fold it gently through the pudding until you eliminate the white streaks. Scrape along the bottom of the bowl as you fold.
Avoid vigorous whisking at this stage. Gentle folding helps preserve the filling’s fluffy texture.
3. Crush the cookies.
Place 24 Golden sandwich cookies, including their cream filling, in a food processor. Pulse until you have mostly fine crumbs with a few small pieces for texture.
Alternatively, seal the cookies in a sturdy food-storage bag, press out excess air, and crush them with a rolling pin.
Layer the Cups and Add the Christmas Tree Cakes
4. Arrange your cups.
Set eight clear, 8-ounce cups on a tray that fits in your refrigerator. Keep the filling, crumbs, and a small spoon nearby.
5. Build the layers.
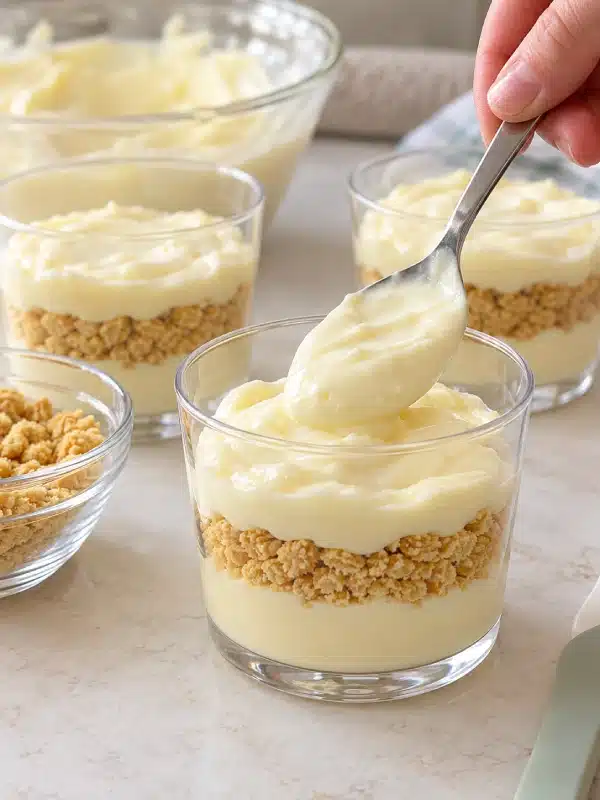
Divide half the pudding filling evenly among the cups. Next, divide the cookie crumbs among all eight cups. Spoon the remaining filling over the crumbs, creating a pale top layer that resembles snow.
Use two small spoons or a piping bag to keep the cup walls tidy. Leave room below each rim for decorating; the dessert doesn’t need to fill the entire cup.
6. Chill the cups.
Cover the cups and refrigerate for at least 30 minutes to firm the filling. Longer chilling will soften the cookie layer, so choose your timing according to your preferred texture.
7. Decorate before serving.
Unwrap eight Christmas Tree Cakes. Nestle the broad base of one cake slightly into each cup’s filling. If a cake leans, rest it gently against the inside rim. Finish with a light scattering of Christmas sprinkles.
Recipe at a glance: Makes 8 dessert cups. Allow approximately 20 minutes of preparation, including the pudding’s initial setting time, plus 30 minutes of refrigeration. Total estimated time: 50 minutes. No baking required.

Christmas Tree Cake Dirt Cups
Ingredients
Equipment
Method
- Pour 2 cups of cold milk into a mixing bowl. Add the instant vanilla pudding mix, using a standard box that calls for 2 cups of milk. Whisk according to the package directions, usually about 2 minutes, until smooth. Let the pudding stand for the package’s recommended setting time until thick enough to mound softly on a spoon. If the mixture remains runny, check the pudding type and milk measurement before continuing.
- Add the 8-ounce tub of refrigerator-thawed whipped topping to the thickened pudding. Using a spatula, gently fold the topping into the pudding, scraping the bottom of the bowl until no white streaks remain. Avoid vigorous whisking to preserve the filling’s light, fluffy texture.
- Place 24 Golden sandwich cookies, including their cream filling, into a food processor. Pulse until mostly fine crumbs form, leaving a few small pieces for texture. Alternatively, place the cookies in a sturdy sealed food-storage bag, press out excess air, and crush them using a rolling pin.
- Arrange eight clear, 8-ounce serving cups on a tray that fits inside your refrigerator. Place the prepared pudding filling, crushed cookie crumbs, and a small spoon nearby for easy assembly.
- Divide half of the prepared pudding filling evenly among the eight cups. Next, distribute the crushed cookie crumbs evenly among the cups. Spoon the remaining pudding filling over the crumbs, creating a pale top layer resembling snow. Use two small spoons or a piping bag to keep the cup walls tidy. Leave some space below each rim for the Christmas Tree Cake decorations.
- Cover the assembled dessert cups and refrigerate for at least 30 minutes to firm the filling. Longer chilling produces softer, more cake-like cookie layers. Adjust the chilling duration according to your preferred cookie texture.
- Just before serving, unwrap eight Little Debbie Christmas Tree Cakes. Gently nestle the broad base of one cake into the pudding filling of each cup. If a cake leans, rest it against the inside rim for support. Finish each dessert with a light scattering of Christmas sprinkles, using approximately 2 teaspoons total or adjusting to taste. Serve chilled.
Notes
How Do You Serve, Store, and Customize Them?

Prepare Christmas Tree Cake Dirt Cups ahead by assembling the pudding and cookie layers, covering the cups, and refrigerating them. Keep the snack cakes and sprinkles separate until serving. Transport the cups upright in a cooler with ice packs, then decorate them once you reach your destination.
Make Ahead, Refrigerate, and Transport the Cups
For easier holiday preparation, assemble the cups up to one day ahead. Expect the cookie crumbs to soften overnight. If you prefer more crunch, refrigerate the filling separately, store the crumbs in an airtight container, and assemble closer to serving.
Keep the cups at 40°F or below. Follow USDA guidance on handling leftovers: refrigerate perishable food within two hours, or within one hour when temperatures exceed 90°F. Count transport and buffet time together.
For this recipe, plan to enjoy refrigerated leftovers within three days, and follow any shorter storage instructions on your ingredient packages. This practical window favors texture; it doesn’t extend the life of ingredients that already approach their storage limits.
For transport, arrange the covered cups in a snug, shallow container. Keep them upright in an insulated cooler with ice packs. Carry unopened snack cakes separately and add them at the destination.
If refrigerator space runs short, choose a complementary treat such as no-bake cookies and follow that recipe’s storage instructions.
Prevent Runny Filling and Build a Holiday Dessert Table
These cups belong to the broader dirt cake family of cookie-and-pudding desserts. Their success depends on thick filling, balanced layers, and thoughtful decorating.
- Runny filling: Check the pudding type and milk quantity. Let the pudding set before adding whipped topping. Extra cookie crumbs won’t correct an incorrectly mixed pudding base.
- Soft cookie layers: Assemble closer to serving for more texture. Overnight refrigeration naturally creates softer, cake-like crumbs.
- Bleeding sprinkles: Add them at the last minute. Moist pudding can dissolve colored sugar and draw streaks across the white surface.
- Leaning cake toppers: Chill the filling first, then nestle each cake’s broad base into it. Use the inside rim for gentle support.
- Overly sweet portions: Serve smaller amounts of filling rather than adding more toppings.
For a chocolate variation, replace the Golden cookies with chocolate sandwich cookies. Keep the remaining quantities consistent. For 16 servings, double every ingredient and use 16 cups; mix the filling in two batches if your bowl feels crowded.
Build a varied holiday spread with gingerbread cookies for warm spice and red velvet cookies for festive color. For familiar cookie options, serve either classic chocolate chip cookies or brown butter chocolate chip cookies alongside the chilled cups.
At EAT WELL, my approach stays close to my mom’s: choose manageable recipes and leave time to enjoy the people around the table.
Christmas Tree Cake Dirt Cups FAQs
Ingredients and Assembly Questions
Can I use regular Oreos instead of Golden Oreos?
Yes. Replace the 24 Golden Oreos with 24 regular chocolate Oreos, keeping their cream filling intact. Chocolate cookies create darker “dirt” layers and add cocoa flavor. Golden Oreos give Christmas Tree Cake Dirt Cups a lighter appearance and vanilla-forward flavor. Keep the pudding, milk, and whipped topping quantities the same.
Can I use homemade whipped cream instead of Cool Whip?
Homemade whipped cream offers an alternative, but it can change the filling’s firmness and storage quality. Whip cold heavy cream until it holds firm peaks, then fold it gently into the set pudding. Match the whipped topping’s volume rather than its weight. For the most predictable result with the listed quantities, use the specified whipped topping.
Why is my Christmas dirt cup pudding runny?
Runny filling can result from excess milk, the wrong pudding type, or insufficient setting time. Use instant pudding that calls for two cups of milk per box, measure carefully, and follow its setting instructions. Let the pudding thicken before folding in refrigerator-thawed whipped topping. Avoid adding extra milk to loosen the finished filling.
Make-Ahead and Storage Questions
Can I make Christmas Tree Cake Dirt Cups the night before?
Yes. Assemble the pudding and cookie layers the night before, cover the cups, and refrigerate them. Keep the Christmas tree snack cakes and sprinkles separate until shortly before serving. The cookie crumbs will soften overnight. For crunchier layers, store the filling and crumbs separately, then assemble the cups on serving day.
How long do Christmas Tree Cake Dirt Cups last in the refrigerator?
Plan to enjoy these dessert cups within three days when you keep them covered and refrigerated at 40°F or below. Follow any shorter storage directions on your ingredient packages. Expect softer crumbs and less distinct layers over time. Discard cups that exceed the room-temperature limits described in the storage section.
Can I freeze Christmas Tree Cake Dirt Cups?
For the best texture, skip freezing the assembled cups. Freezing and thawing can change the pudding filling’s consistency, soften the cookies further, and damage the decorations. Refrigerate the cups instead, and prepare only the quantity you need. If you want to work ahead, assemble the undecorated cups one day before serving.
Final Thoughts
A Simple Plan for Holiday Assembly
Christmas Tree Cake Dirt Cups bring creamy pudding, cookie crumbs, and festive snack cakes together without turning on the oven. Prepare the filling, divide the layers evenly, and refrigerate the cups. Add the cakes and sprinkles shortly before serving for a tidy finish.
Bring the Cups to Your Christmas Dessert Table
Serve Christmas Tree Cake Dirt Cups alongside oatmeal raisin cookies or peanut butter cookies, keeping peanut treats clearly identified for guests with allergies. These Christmas Tree Cake Dirt Cups reflect the simple, welcoming approach my mom taught me: make something sweet with care, then enjoy sharing it.