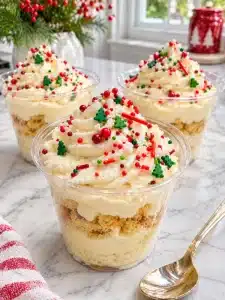
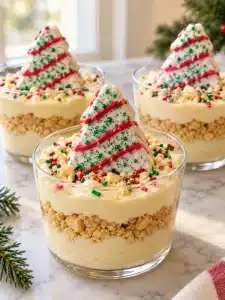
Vintage Christmas Cake Dip Cups combine fluffy vanilla cream cheese dip, tender cake pieces, festive sprinkles, and warm holiday spices in individual dessert cups. This easy no-bake Christmas dessert takes about 20 minutes to prepare, plus chilling time. It’s perfect for Christmas parties, family gatherings, and holiday dessert tables.
The Story Behind These Vintage Christmas Cake Dip Cups
Why This Christmas Dessert Feels So Nostalgic
Hi! I’m Abby Pinkmann, the chef behind EAT WELL WELL, just outside Austin, Texas.
Christmas always reminds me of the busy, happy kitchens I grew up around. My mom had a wonderful way of turning ordinary pantry ingredients into something comforting, often in just 30 minutes.
She didn’t need complicated recipes to make our family feel special. A little vanilla, something sweet, and a kitchen full of laughter usually did the trick.
That’s the spirit behind these Vintage Christmas Cake Dip Cups.
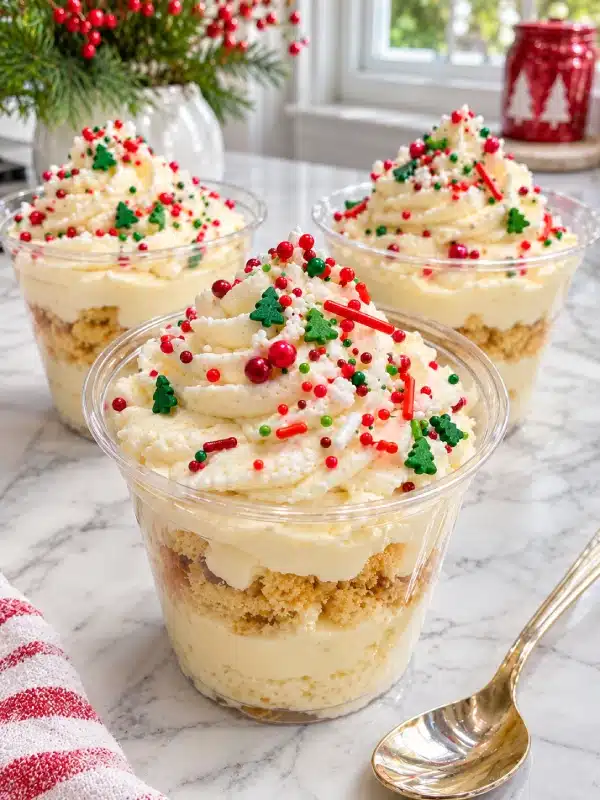
Picture a spoonful of silky vanilla cream, soft golden cake, and tiny red-and-green sprinkles. The cream tastes rich but light, while cinnamon and nutmeg add that familiar Christmas bakery aroma.
I especially love individual holiday desserts because guests can grab a cup and enjoy every layer without slicing a cake.
If you’re planning a festive dessert table, these cups look lovely next to my Christmas Tree Cake Dirt Cups. Both bring cheerful holiday colors to the table with minimal fuss.
In this Article
Key Takeaways: What You Need to Know
- Prep time: 20 minutes
- Chilling time: 30 minutes
- Total time: 50 minutes
- Servings: 8 individual cups
- Difficulty: Easy
- Cooking method: No-bake assembly with fully baked cake
- Flavor: Creamy vanilla, buttery cake, and gentle Christmas spices
- Best for: Christmas parties, potlucks, cookie exchanges, and family gatherings
- Make-ahead tip: Prepare the cream cheese filling the day before serving
The biggest advantage? You can make these little Christmas treats without spending hours in the kitchen.
What Ingredients Do You Need for Vintage Christmas Cake Dip Cups?
Vintage Christmas Cake Dip Cups use cream cheese, powdered sugar, Greek yogurt, vanilla, whipped topping, and fully baked vanilla cake. Cinnamon and nutmeg add seasonal warmth, while Christmas sprinkles bring festive color. These affordable ingredients create a creamy dessert with soft cake layers and a light, fluffy finish.
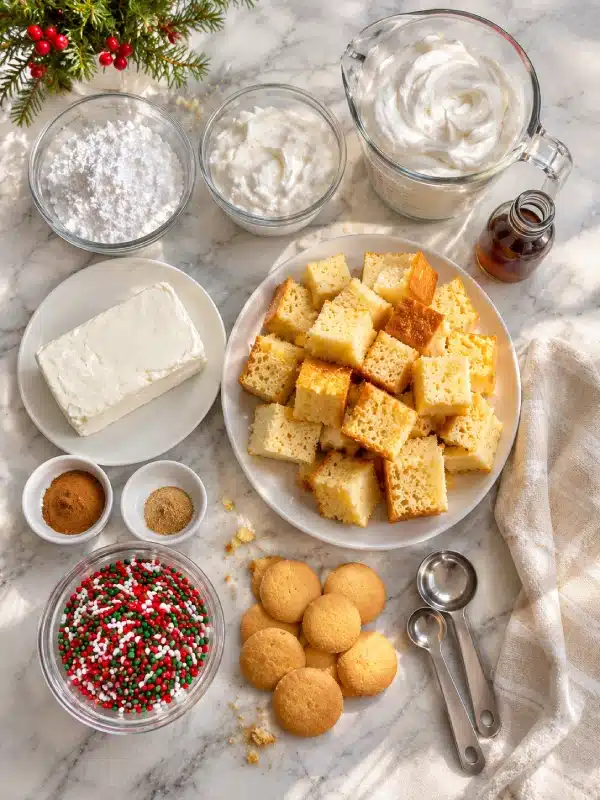
Simple Ingredients for the Creamy Cake Dip
Here’s everything you’ll need to prepare eight small dessert cups.
| Ingredient | Amount |
|---|---|
| Full-fat cream cheese, softened | 8 oz |
| Powdered sugar | ½ cup |
| Plain Greek yogurt | ½ cup |
| Vanilla extract | 1 teaspoon |
| Ground cinnamon | ¼ teaspoon |
| Ground nutmeg | ⅛ teaspoon |
| Thawed whipped topping | 1 cup |
| Fully baked vanilla pound cake | 8 oz |
| Christmas sprinkles | 3 tablespoons |
| Mini vanilla wafers | 16 cookies |
Abby’s kitchen tip: Choose brick-style cream cheese rather than spreadable cream cheese. It creates a thicker dip that holds its shape between the cake layers.
You can also add a few crumbled Christmas Sprinkle Cookies for extra festive texture.
Which Ingredient Substitutions Work Best?
This recipe gives you plenty of room to work with ingredients you already have.
- Vanilla cake: Try fully baked yellow cake, butter cake, or sponge cake.
- Greek yogurt: Substitute sour cream for a richer, tangier flavor.
- Whipped topping: Use stabilized homemade whipped cream.
- Cinnamon: Add a pinch of ground ginger for a spicier Christmas flavor.
- Sprinkles: Choose sanding sugar, mini chocolate chips, or crushed peppermint candy.
For a homemade cookie addition, my Sugar Cookie Recipe makes a wonderful companion.
One important note: always use fully baked cake. Don’t stir raw cake mix or untreated flour into the dip. The FDA explains the safety concerns surrounding raw flour and uncooked dough.
How Do You Make Vintage Christmas Cake Dip Cups?
To make Vintage Christmas Cake Dip Cups, beat softened cream cheese with powdered sugar, Greek yogurt, vanilla, and spices. Gently fold in whipped topping. Layer the mixture with fully baked vanilla cake cubes in eight small dessert cups. Add Christmas sprinkles, refrigerate for 30 minutes, and serve chilled.
Step 1: Make the Fluffy Vanilla Cream Cheese Dip
Start with a large mixing bowl, an electric hand mixer, and a rubber spatula.
- Beat the cream cheese. Mix the softened cream cheese for about one minute until it looks smooth and creamy.
- Add powdered sugar. Beat until the sugar blends into the cream cheese without visible lumps.
- Mix in the flavorings. Add Greek yogurt, vanilla extract, cinnamon, and nutmeg.
- Scrape the bowl. Use a spatula to bring any thick mixture from the sides into the center.
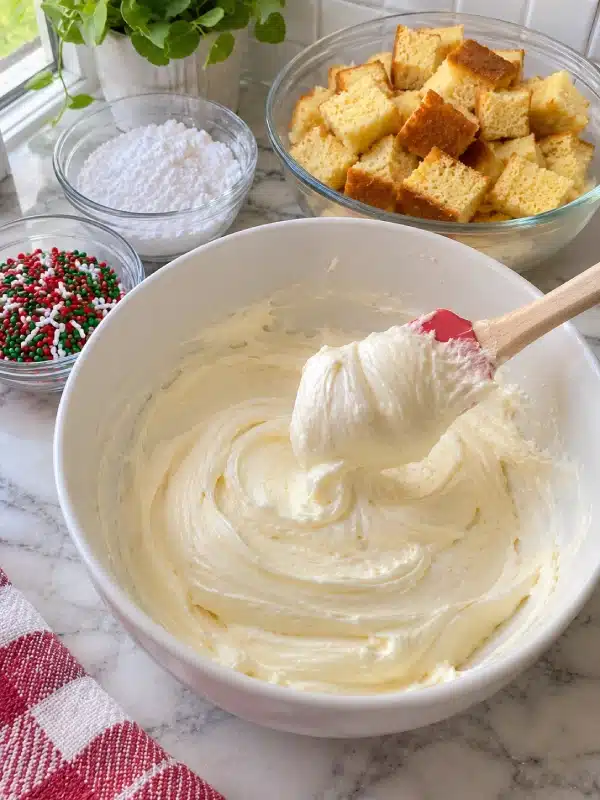
- Fold in the whipped topping. Gently stir until the dip turns light, airy, and fluffy.
The finished mixture should look pale ivory and hold soft peaks when you lift your spatula.
Avoid whipping too aggressively after adding the topping. Gentle folding helps the mixture keep its airy texture.
For another easy sweet treat that skips traditional oven baking, try my No-Bake Cookies Recipe.
Step 2: Assemble the Christmas Dessert Cups
Now it’s time to build those beautiful layers.
First, cut the fully baked and cooled vanilla pound cake into approximately ½-inch cubes.
Then follow these steps:
- Arrange eight clear, 4–5-ounce dessert cups on your marble kitchen counter.
- Add about two tablespoons of vanilla cream cheese dip to the bottom of each cup.
- Place a few small cake cubes over the cream.
- Add another spoonful of dip to cover the cake.
- Finish with a few golden cake pieces.
- Sprinkle the tops with red-and-green Christmas decorations.
- Refrigerate for at least 30 minutes.
- Add two mini vanilla wafers to each cup immediately before serving.
For neater layers, transfer the cream cheese mixture into a piping bag or a zip-top bag with one corner snipped off.
The clear cups reveal each layer beautifully. You’ll see creamy white filling, golden cake, and tiny pops of festive color.
If you enjoy desserts made with simple cake ingredients, my Cake Mix Cookies offer another convenient holiday baking idea.

Vintage Christmas Cake Dip Cups
Ingredients
Equipment
Method
- In a large mixing bowl, beat the softened full-fat cream cheese with an electric hand mixer for about 1 minute, until smooth and creamy. Gradually add the powdered sugar and beat until fully incorporated without visible lumps. Add the plain Greek yogurt, vanilla extract, ground cinnamon, and ground nutmeg, mixing until smooth. Scrape the sides and bottom of the bowl with a rubber spatula. Gently fold in the thawed whipped topping until the mixture becomes light, airy, and fluffy. The finished vanilla cream cheese dip should be pale ivory and hold soft peaks when the spatula is lifted. Avoid overmixing after adding the whipped topping.
- Cut the fully baked and cooled vanilla pound cake into approximately ½-inch cubes. Arrange 8 clear 4–5-ounce dessert cups on your work surface. Add about 2 tablespoons of vanilla cream cheese dip to the bottom of each cup. Place a few cake cubes over the cream, then add another spoonful of dip to cover the cake. Finish with a few golden cake pieces and sprinkle the tops with red-and-green Christmas sprinkles. Refrigerate for at least 30 minutes. Immediately before serving, add 2 mini vanilla wafers to each cup. For neater layers, use a piping bag or a zip-top bag with one corner snipped off. Serve chilled.
Notes
What Makes These Christmas Cake Dip Cups So Delicious?
How Can You Get the Perfect Creamy Texture?
Texture makes a big difference in this dessert.
You want a fluffy filling that feels smooth on your tongue, followed by soft, buttery cake pieces.
Start by softening your cream cheese. Cold cream cheese often creates stubborn lumps.
Next, add the powdered sugar gradually. This helps it blend evenly without covering your counter in a cloud of sugar.
Finally, fold the whipped topping into the mixture instead of beating it aggressively.
My favorite trick: Chill the finished dip before assembling if your kitchen feels warm. A brief rest in the refrigerator helps the cream hold its shape.
The result should feel light, creamy, and rich without becoming overly dense.
For a more colorful Christmas dessert platter, add my Red Velvet Cookies alongside these little cups.
Which Christmas Flavor Variations Should You Try?
Although classic vanilla tastes wonderful, you can create several festive versions.
| Variation | Flavor Adjustment |
|---|---|
| Gingerbread | Add ground ginger and crushed gingerbread cookies. |
| Chocolate Christmas Cake | Replace vanilla cake with chocolate cake and add mini chocolate chips. |
| Peppermint | Add ⅛ teaspoon peppermint extract and crushed candy canes. |
| Eggnog | Replace 2 tablespoons of yogurt with prepared eggnog and add extra nutmeg. |
The gingerbread version tastes especially cozy during December.
If you love that warm blend of cinnamon, ginger, and molasses, my Gingerbread Cookie Recipe makes a delicious dipping option.
How Should You Serve and Store Christmas Cake Dip Cups?
Easy Christmas Party Serving Ideas
These individual desserts look beautiful on a white serving platter or wooden holiday board.
Arrange the cups in small groups and tuck a few evergreen sprigs around the platter for decoration.
For a cozy vintage appearance, add:
- Mini gingerbread cookies for warmth and crunch.
- White chocolate curls for extra sweetness.
- Fresh raspberries for a bright, tart contrast.
- Crushed peppermint for a colorful Christmas finish.
You can even create a dessert station with separate bowls of toppings so guests can finish their own cups.
These holiday treats share some characteristics with a traditional trifle, which combines cake and creamy layers. However, this recipe uses a thicker cream cheese dip and convenient individual portions.
For a fall-to-Christmas dessert spread, pair the cups with my Pumpkin Cookies for another comforting seasonal flavor.
Can You Prepare These Cups Ahead of Time?
Yes, and that’s one reason I enjoy making this recipe during busy holiday weeks.
Prepare the cream cheese mixture up to 24 hours ahead. Cover it tightly and refrigerate.
For the freshest result, assemble the dessert cups a few hours before serving.
Keep the cake cubes separate until assembly if you want more distinct layers. Otherwise, the cake gradually absorbs moisture and becomes softer.
Store the finished cups in airtight containers at 40°F or below. Enjoy them within two to three days for the best quality.
Don’t leave dairy-based desserts at room temperature for more than two hours.
And if you need one more easy treat for a Christmas gathering, my Chocolate Chip Cookie Recipe offers a familiar favorite that pairs nicely with the creamy vanilla dip.
Frequently Asked Questions About Vintage Christmas Cake Dip Cups
Can You Make Vintage Christmas Cake Dip Cups Without Baking?
Yes. Use fully baked store-bought vanilla cake or pound cake. Prepare the cream cheese mixture, layer it with the cake, and chill the cups for 30 minutes. You don’t need to turn on the oven.
How Long Do Christmas Cake Dip Cups Last in the Refrigerator?
Store the cups in airtight containers at 40°F or below for up to two to three days. Add crunchy toppings just before serving so they don’t soften in the refrigerator.
Can You Freeze Christmas Cake Dip Cups?
I don’t recommend freezing the assembled cups. Freezing and thawing can change the texture of the cream cheese mixture and make the cake soggy. Freshly chilled cups offer a better consistency.
What Can You Serve With Christmas Cake Dip?
Serve Christmas cake dip with vanilla wafers, sugar cookies, gingerbread cookies, graham crackers, pretzels, or fresh strawberries. These options create a pleasant contrast between crunchy toppings and creamy filling.
Can You Make Christmas Cake Dip Cups the Night Before?
Absolutely. Prepare the cream cheese dip the night before and refrigerate it in a covered container. Assemble the cups closer to serving and add cookies immediately before placing them on the dessert table.
What Is the Difference Between Christmas Cake Dip and Cake Batter Dip?
Christmas cake dip combines creamy filling with fully baked cake pieces. Cake batter dip often aims to recreate cake batter flavor using cake mix or flavorings. For food safety, avoid untreated raw flour or cake mix in no-bake dips.
Final Thoughts: A Sweet Little Christmas Tradition
Why These Dessert Cups Deserve a Place on Your Holiday Table
Vintage Christmas Cake Dip Cups bring together everything I love about simple holiday cooking.
They taste creamy and comforting, look beautiful in individual glasses, and require very little preparation.
Most importantly, they remind me that food doesn’t need to be complicated to create meaningful moments around the table.
That’s a lesson my mom taught me years ago, and it remains central to everything I share at EAT WELL WELL.
My Final Christmas Kitchen Tip
Keep the cream cheese filling fluffy, use fully baked cake, and add crunchy decorations just before serving.
Those small details help every spoonful taste fresh and delicious.
For even more homemade dessert inspiration, browse my Easy Cookie Recipes and create a Christmas dessert table your family will love.
Happy holiday cooking!