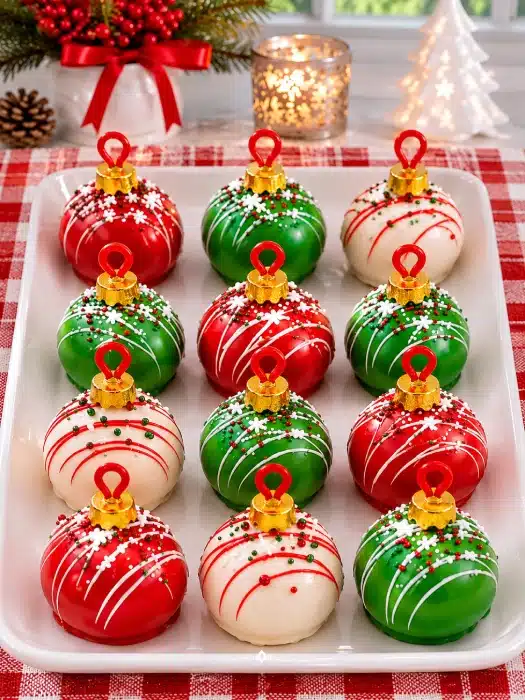
Ornament Oreo Balls are festive, no-bake Christmas treats that combine crushed Oreo cookies, cream cheese, and a smooth chocolate coating. Decorate each ball with colorful candy melts, sparkling sprinkles, and a mini ornament topper. These creamy, chocolatey treats make beautiful additions to holiday dessert trays, Christmas parties, and homemade gift boxes.
The Story Behind These Festive Christmas Oreo Balls
Hi, I’m Abby Pinkmann, the chef behind EAT WELL WELL, just outside Austin, Texas. And if there’s one thing I love about Christmas, it’s finding little ways to make ordinary ingredients feel special.
Growing up in a big, busy family, I watched my mom turn simple pantry staples into food that brought everyone together. She never needed complicated recipes to make the holidays memorable. A little creativity, a warm kitchen, and something sweet usually did the trick.
That’s exactly the feeling I wanted to capture with these ornament-shaped Oreo truffles.
Picture a tray of glossy red, snowy white, and emerald-green chocolate ornaments. Each one has a tiny golden cap, delicate candy decorations, and a rich, creamy Oreo center.
They look like miniature Christmas tree decorations, but you can eat every bite!
The best part? You don’t need an oven, special baking skills, or an entire afternoon.
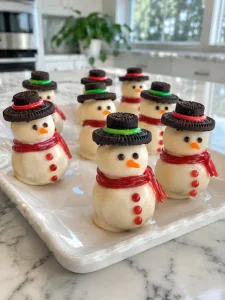
If you love playful holiday treats, you’ll also enjoy my Snowman Oreo Balls. Both recipes transform simple cookies into adorable Christmas desserts.
In this Article
Key Takeaways: What You Need to Know
- No baking required: Make these festive Oreo truffles without turning on your oven.
- Just three main ingredients: Oreo cookies, cream cheese, and melting chocolate create the base.
- Perfect for Christmas: Their colorful ornament design looks beautiful on holiday dessert platters.
- Make-ahead friendly: Prepare them a day or two before your holiday gathering.
- Easy to customize: Choose different chocolate colors, sprinkles, and decorative patterns.
- Great for gifting: Arrange them in festive boxes with parchment paper between layers.
What Are Ornament Oreo Balls, and Why Make Them?
Ornament Oreo Balls are bite-sized Christmas desserts that resemble miniature holiday ornaments. Each treat features a soft Oreo and cream cheese filling beneath a firm chocolate shell. Colorful coatings, decorative piping, and edible ornament caps create their festive appearance. They’re ideal for holiday parties, dessert exchanges, and family baking traditions.
What Makes These Christmas Oreo Truffles Special?
Unlike traditional truffles, these treats don’t require heavy cream, tempering chocolate, or complicated candy-making techniques.
You simply crush the cookies, mix them with softened cream cheese, and shape the mixture into balls.
After chilling, dip each ball into melted candy coating and add decorative details.
The result tastes rich and chocolatey, with a tender, slightly fudgy center and a delicate chocolate shell that snaps gently when you take a bite.
The Oreo filling gives these little treats their familiar cookies-and-cream flavor.
Interestingly, the classic Oreo cookie has become a popular ingredient in homemade desserts, including cheesecakes, cookie truffles, and no-bake sweets.
Why Are They Perfect for Christmas Parties?
These Christmas ornament treats work especially well when you want a dessert that looks impressive without taking hours to prepare.
They’re ideal for:
- Christmas Eve gatherings with family and friends.
- Holiday cookie exchanges when you want something different.
- School Christmas parties with adult supervision during preparation.
- Homemade edible gifts for neighbors and coworkers.
- Winter dessert tables alongside cookies, cakes, and pudding cups.
For a colorful dessert spread, pair them with my Christmas Sprinkle Cookies.
The crisp cookies and creamy truffles create a lovely contrast in texture.
What Ingredients Do You Need for Ornament Oreo Balls?
You only need a few easy-to-find ingredients to make these holiday treats. Oreo cookies and cream cheese create the rich filling, while melting wafers form the colorful outer shell. Decorative candy, sprinkles, and mini chocolate caps give each ball its Christmas ornament appearance without requiring complicated techniques.

Simple Ingredients for Christmas Ornament Oreo Truffles
Prep: 25 minutes
Chill: 45–60 minutes
Yield: 24 balls
INGREDIENTS AT A GLANCE
| Ingredient | Amount | Purpose |
|---|---|---|
| Regular Oreo cookies | 36 cookies (about 14 oz) | Rich chocolate cookie base |
| Full-fat cream cheese | 8 oz | Creamy filling |
| White melting wafers | 12 oz | White coating and colored accents |
| Red candy melts | 6 oz | Red ornament coating |
| Green candy melts | 6 oz | Green ornament coating |
| Gold or yellow candy melts | 3 oz | Ornament caps and details |
| Christmas sprinkles | ¼ cup | Decorative accents |
| Mini pretzel loops | 24 small pieces | Edible ornament loops |
| Optional coconut oil | 1–2 tsp | Thin coating if necessary |
Use regular Oreo cookies rather than Double Stuf cookies. Their filling-to-cookie ratio works well with the cream cheese.
For the pretzel loops, break small curved sections from mini pretzels. Leave enough of each piece to anchor it into the candy cap.
Important: Choose candy melts or melting wafers rather than regular chocolate chips when possible. They melt smoothly and usually create a more consistent shell.
Which Tools Make Decorating Easier?
You won’t need professional pastry equipment.
A food processor quickly turns whole cookies into fine crumbs. However, you can also crush them inside a sealed plastic bag using a rolling pin.
Gather a mixing bowl, rubber spatula, parchment-lined baking sheet, microwave-safe bowls, and a fork or dipping tool.
A small piping bag helps create neat ribbons, snowflakes, and decorative stripes.
I also recommend keeping a toothpick nearby. It helps guide melted chocolate around each ornament cap without smearing the coating.
For other simple desserts that use familiar pantry ingredients, browse my easy cookie recipes.
How to Make Ornament Oreo Balls Step by Step
Making Ornament Oreo Balls takes a few simple stages. Crush the Oreo cookies, combine them with cream cheese, and roll the mixture into smooth balls. Chill until firm, then dip each one in melted candy coating. Finish with edible ornament caps, colorful piping, and festive sprinkles.
Step 1: Prepare the Oreo Cookie Filling
Add 36 whole Oreo cookies, including their cream filling, to a food processor.
Pulse until you have fine, even crumbs.
Next, add 8 ounces of softened cream cheese.
Mix until the ingredients form a thick, chocolate-colored dough without visible white streaks.
The mixture should feel soft but hold its shape.
If you use a mixing bowl instead, stir the cookie crumbs and cream cheese together with a sturdy spatula.
Avoid adding milk or additional liquid. The cream cheese already provides enough moisture.
Step 2: Shape and Chill the Oreo Balls
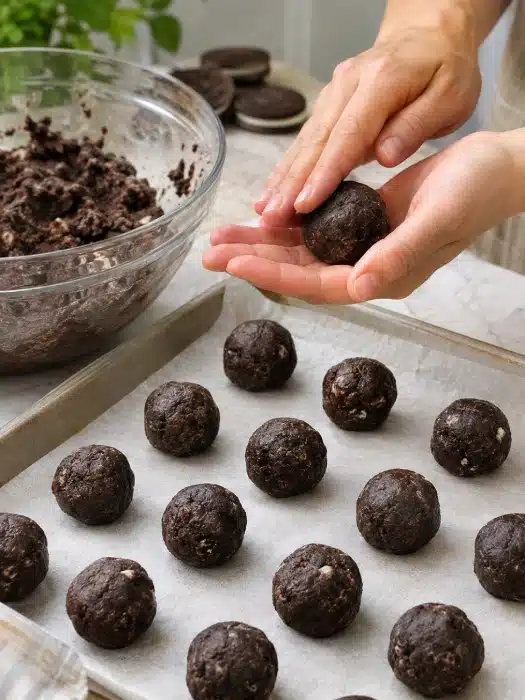
Scoop approximately 1 tablespoon of cookie mixture for each truffle, dividing the dough into 24 portions.
Roll each portion between your palms until smooth.
Place the balls on a parchment-lined baking sheet.
Refrigerate for 30–45 minutes, or until they feel firm enough to dip without losing their shape.
For quicker preparation, freeze them for 15–20 minutes.
However, don’t leave them in the freezer until completely frozen. Very cold centers can cause the coating to crack as they warm.
Step 3: Melt the Chocolate Coating
Place the red, green, and white candy melts into separate microwave-safe bowls.
Heat one bowl at a time in 20-second intervals at 50% microwave power.
Stir thoroughly between intervals.
Stop heating when the remaining small pieces melt as you stir.
You want smooth, glossy coating that flows easily from a spoon.
If the coating seems too thick, stir in a small amount of coconut oil, about ¼ teaspoon at a time.
Avoid overheating the candy melts. Excess heat can make them thick, grainy, or difficult to work with.
Step 4: Dip the Oreo Balls
Remove a few chilled Oreo balls from the refrigerator.
Drop one into the melted coating and gently turn it with a fork.
Lift the ball and tap the fork against the bowl to remove excess coating.
Carefully transfer it onto parchment paper.
Repeat with the remaining balls, alternating red, green, and white coatings.
For an attractive Christmas color combination, prepare eight ornaments in each color.
Let the coating firm up before adding detailed decorations.
Step 5: Add the Christmas Ornament Decorations
Now comes my favorite part: transforming ordinary cookie truffles into miniature Christmas ornaments.
Melt the gold or yellow candy coating.
Place a small dot on top of each ball and attach a mini pretzel loop.
Next, pipe a narrow band of gold coating around the bottom of the loop to resemble a metal ornament cap.
Use contrasting candy melts to create curved stripes, dots, tiny snowflakes, or delicate swirls.
Add sprinkles while the decorative coating remains soft.
For a classic ornament design, decorate red balls with gold accents, green balls with white stripes, and white balls with red and green dots.
Allow everything to set completely before moving the finished treats.

Ornament Oreo Balls
Ingredients
Equipment
Method
- Place 36 whole regular Oreo sandwich cookies, including their cream filling, into a food processor. Pulse until they become fine, even crumbs. Add 8 ounces of softened full-fat cream cheese and mix until a thick, chocolate-colored dough forms without visible white streaks. The mixture should feel soft but hold its shape. Alternatively, combine the crumbs and cream cheese in a mixing bowl using a sturdy spatula. Avoid adding milk or other liquid.
- Scoop approximately 1 tablespoon of Oreo mixture per truffle, dividing the dough into 24 portions. Roll each portion between your palms until smooth and place on a parchment-lined baking sheet. Refrigerate for 30–45 minutes until firm enough to dip without losing shape. For quicker preparation, freeze for 15–20 minutes, but avoid freezing completely solid because extremely cold centers can cause the coating to crack.
- Place the red, green, and white candy melts into separate microwave-safe bowls. Heat one bowl at a time in 20-second intervals at 50% microwave power, stirring thoroughly between intervals. Stop heating when the remaining small pieces melt as you stir. The coating should be smooth, glossy, and fluid. If it is too thick, add a small amount of coconut oil, approximately ¼ teaspoon at a time. Avoid overheating the candy melts.
- Remove a few chilled Oreo balls from the refrigerator. Drop one ball into melted candy coating and gently turn it with a dipping fork until completely covered. Lift it out, tap the fork against the bowl to remove excess coating, and transfer the ball to parchment paper. Repeat with the remaining balls, alternating red, green, and white coatings. For an attractive Christmas assortment, prepare eight ornaments in each color. Let the coating firm before adding detailed decorations.
- Melt the gold or yellow candy coating. Place a small dot on top of each coated Oreo ball and attach a mini pretzel loop. Pipe a narrow band of gold coating around the bottom of each loop to resemble a metal ornament cap. Use contrasting candy melts to create curved stripes, dots, tiny snowflakes, or delicate swirls. Add Christmas sprinkles while the decorative coating remains soft. For a classic design, decorate red ornaments with gold accents, green ornaments with white stripes, and white ornaments with red and green dots. Allow the decorations to set completely before moving or serving the finished treats.
Notes
How Do You Decorate and Serve Christmas Oreo Ornaments?
Easy Decorating Ideas for Beautiful Holiday Treats
You don’t need complicated patterns to create impressive results.
In fact, simple decorations often look more elegant.
Try combining different finishes:
| Ornament Style | Coating Color | Decoration |
|---|---|---|
| Classic Christmas | Red | Gold stripes and sprinkles |
| Snowy Winter | White | White snowflakes and pearl sprinkles |
| Evergreen Holiday | Green | White swirls and gold dots |
| Candy Cane | White | Red diagonal stripes |
| Vintage Ornament | Red or green | Gold scallops and candy pearls |
For a traditional Christmas look, use deep red, forest green, creamy white, and soft metallic gold.
If you prefer a playful style, try pink, light blue, or lavender candy melts.
Just remember to use oil-based candy coloring if you tint white candy melts. Regular water-based food coloring can cause the coating to seize.
What Should You Serve With Ornament Oreo Balls?
These rich treats taste wonderful alongside lighter holiday desserts.
Arrange them on a white ceramic platter with alternating colors. Leave a little space between the ornaments so guests can admire each design.
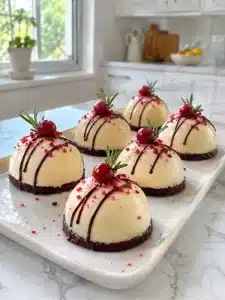
For larger Christmas gatherings, serve them with my Christmas White Chocolate Mousse Domes.
The airy mousse provides a lovely contrast to the dense Oreo filling.
You could also create a cheerful dessert table featuring Vintage Christmas Cake Dip Cups and Christmas Tree Cake Dirt Cups.
For drinks, consider hot cocoa, coffee, cold milk, or peppermint tea.
Because these Oreo truffles contain cream cheese, keep them refrigerated until serving time.
How Do You Store Ornament Oreo Balls and Avoid Common Mistakes?
Can You Make These No-Bake Christmas Treats Ahead?
Yes! Ornament Oreo Balls are excellent make-ahead Christmas desserts.
Store finished truffles in an airtight container in the refrigerator for up to 5 days.
Place parchment paper between layers to protect the decorative coating.
For longer storage, freeze the plain, undecorated Oreo balls in a freezer-safe container for up to 2 months. Thaw them overnight in the refrigerator before dipping and decorating.
For the neatest appearance, I prefer adding the chocolate decorations closer to serving day.
Keep the treats chilled during storage and transport. The USDA’s food safety guidance recommends refrigerating perishable foods promptly and limiting their time at room temperature.
As a practical serving rule, don’t leave cream-cheese truffles unrefrigerated for more than 2 hours, or 1 hour when temperatures exceed 90°F.
Why Do Oreo Balls Crack or Fall Apart?
A few small preparation mistakes can affect the finished ornaments.
Cracked chocolate coating: The filling may be too cold when you dip it. Let frozen balls rest briefly in the refrigerator before coating.
Filling falls apart: The cookies may have coarse crumbs, or the cream cheese hasn’t mixed evenly. Process until the filling forms a cohesive dough.
Chocolate looks thick or lumpy: Excessive heat can damage candy coating. Use short microwave intervals and stir often.
Decorations slide off: Attach sprinkles and candy details while the decorative coating remains soft.
Ornaments develop condensation: Sudden temperature changes can create moisture. Keep the treats in a closed container while they gradually come to serving temperature.
A little patience during chilling and decorating makes a noticeable difference.
Frequently Asked Questions About Ornament Oreo Balls
Can I make Ornament Oreo Balls without cream cheese?
Yes. You can use a thick cookie butter or suitable dairy-free cream cheese alternative. However, these substitutions change the flavor, sweetness, and texture. Add the replacement gradually until the crushed cookies form a dough that holds together.
How long do Oreo balls need to chill before dipping?
Refrigerate the shaped Oreo balls for approximately 30–45 minutes. They should feel firm but not frozen solid. Proper chilling helps them maintain their round shape when you dip them into warm candy coating.
Can I use chocolate chips instead of candy melts?
Yes, but chocolate chips can create a thicker coating and may not set as firmly at room temperature. Melting wafers or candy melts work especially well for colorful ornament decorations.
How do you make Oreo balls look like Christmas ornaments?
Dip each Oreo ball in colorful candy coating. Attach a small edible loop using a pretzel piece, then pipe gold-colored candy coating around its base. Finish with decorative stripes, dots, or sprinkles to resemble traditional Christmas ornaments.
Can kids help make Christmas ornament Oreo truffles?
Absolutely. Kids can help crush cookies, roll the filling, and add sprinkles. Adults should handle melting the chocolate and supervise the dipping process because hot candy coating can burn skin.
Can you freeze decorated Oreo balls?
Yes, although freezing may affect the appearance of delicate decorations. Place the treats in a single layer inside an airtight container. Thaw them in the refrigerator before serving, and avoid frequent temperature changes.
Final Thoughts: A Sweet Christmas Tradition
There’s something special about turning a package of cookies into a tray of cheerful Christmas ornaments.
These no-bake treats capture everything I love about holiday cooking: simple ingredients, creative decorating, and the chance to share something homemade with people you care about.
At EAT WELL WELL, I believe memorable food doesn’t need to be complicated. Sometimes, a little cream cheese, a handful of cookies, and colorful chocolate are all you need.
So gather your ingredients, put on your favorite Christmas music, and enjoy making these festive little treats.
And if you’re planning a full holiday baking afternoon, my Gingerbread Cookie Recipe makes a wonderful companion to these creamy Oreo ornaments.