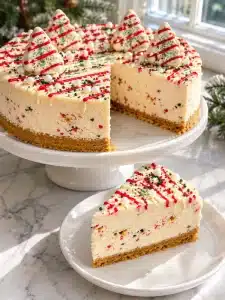
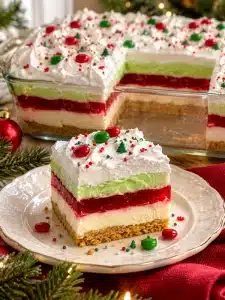
No-Bake Christmas Lush Dessert combines a buttery graham cracker crust, fluffy cream cheese filling, bright red strawberry gelatin, creamy pistachio pudding, and snowy whipped topping. This colorful holiday dessert serves 15 people and requires no oven. Make it ahead for Christmas parties, family gatherings, or festive potlucks.
The Story Behind This Festive Christmas Dessert
Hi, I’m Abby Pinkmann, the chef behind EAT WELL WELL, just outside Austin, Texas. Cooking has always been my love language, and Christmas desserts bring back everything I love about family gatherings.
Growing up in a big, busy family, I watched my mom turn simple pantry ingredients into comforting dishes. She taught me that delicious food doesn’t need complicated steps. It just needs a little care.
That’s exactly the spirit behind this Christmas lush dessert.
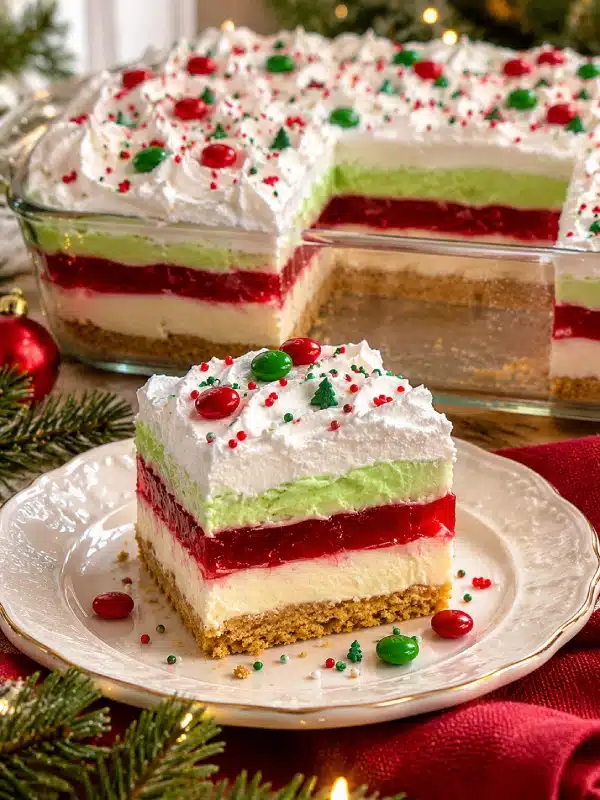
Picture a buttery graham cracker base, a silky cheesecake-style filling, a glossy strawberry layer, and soft pistachio pudding. Finish everything with fluffy whipped topping and colorful Christmas sprinkles.
Every square delivers creamy, sweet, slightly tangy flavors with a satisfying crumbly crust.
Even better? You can prepare everything ahead of time. That means more time with family and less time rushing around the kitchen on Christmas Day.
If you enjoy easy holiday sweets, you’ll also love my Christmas White Chocolate Mousse Domes and adorable Snowman Oreo Balls.
In this Article
Key Takeaways: What You Need to Know
- No oven required: This Christmas dessert sets entirely in the refrigerator.
- Five delicious layers: Graham crackers, cream cheese, strawberry gelatin, pistachio pudding, and whipped topping create beautiful holiday colors.
- Perfect for gatherings: One 9×13-inch baking dish makes approximately 15 servings.
- Make-ahead friendly: Prepare the dessert the day before Christmas for a more relaxed celebration.
- Easy ingredients: Use instant pudding, prepared whipped topping, and pantry staples.
- Best texture: Chill each layer completely before adding the next.
Prep time
30 minutes (approx.)
Chilling time
4 hr 20 min–5 hr 20 min, plus cooling
Servings
15 squares
Equipment
9×13-inch glass dish
Why Is No-Bake Christmas Lush Dessert Perfect for the Holidays?
This layered Christmas dessert offers an easy alternative to traditional holiday cakes and pies. Its red strawberry gelatin, green pistachio pudding, and white cream filling create festive colors without baking. The recipe suits beginners, busy hosts, and anyone who wants a chilled dessert for a Christmas celebration.
What Makes This Christmas Lush Dessert Special?
Traditional lush desserts combine a crumb crust with creamy fillings and pudding. This holiday version adds a colorful strawberry gelatin layer for a striking red-and-green presentation.
Each component brings something different:
- Graham cracker crust: A sweet, buttery foundation with a delicate crunch.
- Cream cheese filling: Smooth, rich, and slightly tangy.
- Strawberry gelatin: Fruity sweetness and a vibrant ruby-red color.
- Pistachio pudding: A creamy texture with a mild nutty flavor.
- Whipped topping: A light, fluffy finish.
The gelatin also creates a distinct texture between the two creamy layers. For background on how gelatin forms its characteristic gel, see Wikipedia’s explanation of gelatin.
When Should You Serve This Easy Holiday Dessert?
This dessert works especially well for Christmas Eve dinners, Christmas Day celebrations, school holiday parties, and winter potlucks.
It also fits perfectly into a holiday dessert buffet alongside Vintage Christmas Cake Dip Cups or Christmas Tree Cake Dirt Cups.
Since the dessert needs several hours to chill, prepare it the evening before your celebration. Add the candies and sprinkles just before serving.
What Ingredients Do You Need for Christmas Lush Dessert?
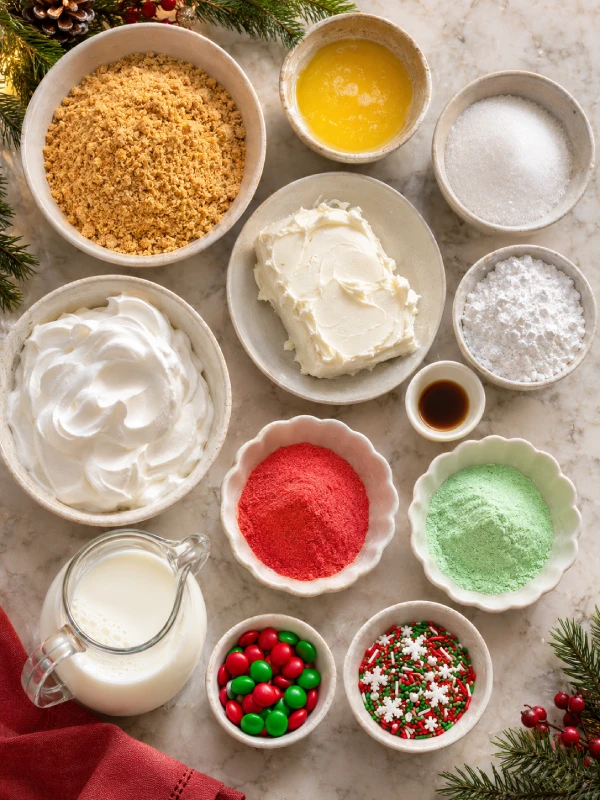
You need graham cracker crumbs, butter, sugar, cream cheese, vanilla, whipped topping, strawberry gelatin, instant pistachio pudding, milk, and Christmas decorations. Each ingredient creates a distinct layer. Use softened cream cheese, cold milk, and thawed whipped topping for smooth textures and clean slices.
Complete Ingredient List
All quantities below follow the original recipe and make approximately 15 servings.
For the Graham Cracker Crust
| Ingredient | Amount |
|---|---|
| Graham cracker crumbs | 2 cups (200g) |
| Unsalted butter, melted | ½ cup (113g) |
| Granulated sugar | 2 tbsp |
For the Cream Cheese Layer
| Ingredient | Amount |
|---|---|
| Cream cheese, softened | 8 oz (225g) |
| Powdered sugar | ½ cup (60g) |
| Vanilla extract | 1 tsp |
| Whipped topping, thawed | 1 cup |
For the Strawberry Gelatin Layer
| Ingredient | Amount |
|---|---|
| Strawberry gelatin | 1 package (3 oz / 85g) |
| Boiling water | 1 cup (240ml) |
| Cold water | 1 cup (240ml) |
For the Pistachio Pudding Layer
| Ingredient | Amount |
|---|---|
| Instant pistachio pudding mix | 2 packages (3.4 oz / 96g each) |
| Cold milk | 2 cups (480ml) |
| Whipped topping, thawed | 1 cup |
For the Christmas Topping
| Ingredient | Amount |
|---|---|
| Whipped topping, thawed | 2 cups |
| Red and green candies | ¼ cup |
| Red, green, and white Christmas sprinkles | 1 tbsp |
Abby’s ingredient tip: You’ll need 4 cups of thawed whipped topping in total. Divide it before you begin so you have enough for the cream cheese layer, pistachio pudding, and final topping.
What Kitchen Tools Will You Need?
You don’t need any special baking equipment. Gather a 9×13-inch glass baking dish, mixing bowls, measuring cups, a whisk, an electric mixer, and a flexible spatula.
A wide serving spatula also helps you lift the finished squares without crushing the delicate layers.
How Do You Make No-Bake Christmas Lush Dessert Step by Step?
Start with a chilled graham cracker crust and spread the cream cheese filling on top. Next, add cooled strawberry gelatin and refrigerate until firm. Finish with pistachio pudding, whipped topping, and Christmas decorations. Chill each layer separately to keep the colors distinct and the squares easy to serve.
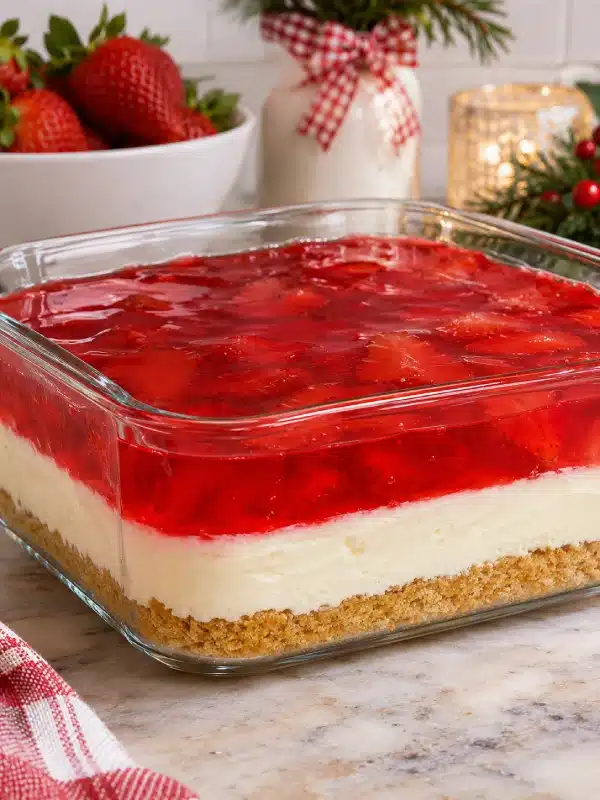
Steps 1–4: Build the Crust, Cream Cheese, and Strawberry Layers
Step 1: Prepare the graham cracker crust.
Combine 2 cups graham cracker crumbs, ½ cup melted butter, and 2 tablespoons granulated sugar in a medium bowl.
Stir until the crumbs resemble damp sand. Press firmly into the bottom and corners of your 9×13-inch glass baking dish.
Refrigerate for 20 minutes.
Step 2: Make the cream cheese layer.
Beat 8 ounces softened cream cheese until smooth. Add ½ cup powdered sugar and 1 teaspoon vanilla extract.
Continue beating until creamy and lump-free.
Gently fold in 1 cup thawed whipped topping. Spread evenly over the chilled crust.
Cover and refrigerate for at least 30 minutes.
Step 3: Prepare the strawberry gelatin.
Add the 3-ounce package of strawberry gelatin to 1 cup boiling water.
Stir until the powder dissolves completely. Add 1 cup cold water and mix again.
Let the mixture cool, then refrigerate briefly until slightly thickened but still pourable.
Important: Never pour warm gelatin directly onto the cream cheese filling. Heat can soften the white layer and blur the colors.
Step 4: Add the festive red layer.
Remove the dessert from the refrigerator.
Hold a spoon just above the cream cheese filling. Slowly pour the cooled gelatin over the back of the spoon.
This technique distributes the liquid gently and helps preserve the white layer underneath.
Refrigerate for 2–3 hours, until the gelatin feels completely firm.
Steps 5–8: Add Pistachio Pudding and Christmas Decorations
Step 5: Make the pistachio pudding layer.
Whisk both 3.4-ounce packages of instant pistachio pudding with 2 cups cold milk for approximately 2 minutes.
Allow the pudding to thicken briefly. Then fold in 1 cup thawed whipped topping.
Carefully spoon the pale green mixture over the fully set strawberry gelatin.
Smooth with a spatula without disturbing the red layer.
Refrigerate for at least 30 minutes.
Step 6: Add the snowy whipped topping.
Spread the remaining 2 cups thawed whipped topping over the chilled pistachio pudding.
Create gentle swirls with a spatula for a soft, snowy appearance.
Cover carefully without touching the surface.
Refrigerate for at least 1 hour.
Step 7: Decorate for Christmas.
Just before serving, scatter ¼ cup red and green candies over the whipped topping.
Finish with 1 tablespoon red, green, and white Christmas sprinkles.
Spread the decorations evenly so every square gets a little festive color.
Step 8: Slice and serve.
Use a sharp knife to cut the chilled dessert into approximately 15 squares.
Wipe the blade between cuts. Then lift each portion with a wide spatula.
You’ll reveal the golden graham cracker base, creamy white filling, ruby-red gelatin, soft green pistachio pudding, and fluffy white topping.

No-Bake Christmas Lush Dessert
Ingredients
Equipment
Method
- Combine 2 cups graham cracker crumbs, ½ cup melted unsalted butter, and 2 tablespoons granulated sugar in a medium mixing bowl. Stir until the mixture resembles damp sand. Press firmly and evenly into the bottom and corners of a 9×13-inch glass baking dish. Refrigerate for 20 minutes to allow the crust to firm.
- Beat 8 ounces softened cream cheese in a mixing bowl until smooth. Add ½ cup powdered sugar and 1 teaspoon vanilla extract, then continue beating until creamy and free of lumps. Gently fold in 1 cup thawed whipped topping. Spread the cream cheese mixture evenly over the chilled graham cracker crust. Cover and refrigerate for at least 30 minutes.
- Add the 3-ounce package of strawberry gelatin to 1 cup boiling water. Stir until the gelatin powder dissolves completely. Add 1 cup cold water and mix again. Allow the gelatin to cool, then refrigerate briefly until slightly thickened but still pourable. Do not pour warm gelatin directly over the cream cheese filling, because it can soften the layer and blur the colors.
- Remove the chilled dessert from the refrigerator. Hold a spoon just above the cream cheese layer and slowly pour the cooled, still-pourable strawberry gelatin over the back of the spoon. This helps distribute the liquid gently without disturbing the white filling. Refrigerate for 2–3 hours until the red gelatin layer is completely firm.
- Whisk both 3.4-ounce packages of instant pistachio pudding mix with 2 cups cold milk for approximately 2 minutes. Allow the pudding to thicken briefly, then gently fold in 1 cup thawed whipped topping. Carefully spoon the pale green pudding mixture over the fully set strawberry gelatin and smooth with a spatula without disturbing the red layer. Refrigerate for at least 30 minutes.
- Spread the remaining 2 cups thawed whipped topping evenly over the chilled pistachio pudding layer. Create gentle swirls with a spatula for a soft, snowy appearance. Cover the dessert carefully without touching the topping and refrigerate for at least 1 hour.
- Just before serving, scatter ¼ cup red and green candies evenly over the whipped topping. Finish with 1 tablespoon red, green, and white Christmas sprinkles. Distribute the decorations so each square receives some festive color.
- Use a sharp knife to cut the thoroughly chilled dessert into approximately 15 squares. Wipe the knife blade between cuts for cleaner layers. Lift each square carefully with a wide serving spatula and serve chilled, displaying the graham cracker crust, white cream cheese filling, red strawberry gelatin, green pistachio pudding, and fluffy white topping.
Notes
How Can You Get Perfect Layers Every Time?
The secret to beautiful Christmas lush dessert layers comes down to temperature, patience, and gentle spreading. Chill the cream cheese filling before adding gelatin, let the strawberry layer set completely, and use cold milk for the pudding. These simple techniques help preserve the dessert’s distinct colors and creamy texture.
Tips for Firm Layers and Clean Slices
A few small details can make a noticeable difference.
- Soften the cream cheese: Bring it to room temperature before mixing to prevent lumps.
- Cool the gelatin: Let it thicken slightly before pouring, but don’t let it set in the bowl.
- Use instant pudding: Cook-and-serve pudding requires different preparation and won’t behave the same way.
- Keep the milk cold: Cold milk helps instant pudding thicken properly.
- Chill between steps: Never rush the strawberry gelatin layer.
- Use a warm, dry knife: Dip your knife in warm water, wipe it dry, and slice slowly.
If you love simple desserts that don’t require an oven, try my No-Bake Cookies Recipe for another easy family treat.
What Mistakes Should You Avoid?
| Common problem | Easy solution |
|---|---|
| Crust crumbles | Press the crumbs firmly into the dish. |
| Cream cheese has lumps | Soften it before beating. |
| Gelatin mixes with cream cheese | Cool the gelatin and pour gently over a spoon. |
| Red and green layers blend | Let the gelatin set completely before adding pudding. |
| Pudding seems runny | Use cold milk and instant pudding mix. |
| Sprinkles bleed color | Add decorations right before serving. |
Another helpful tip: Always use a clean spatula when spreading a new layer. That prevents unwanted color streaks.
How Should You Serve and Store Christmas Lush Dessert?
Serve this dessert straight from the refrigerator. Its chilled, creamy texture makes a lovely contrast to warm Christmas drinks.
For a beautiful presentation, arrange individual squares on white dessert plates. The red and green layers create most of the decoration naturally.
Pair smaller portions with Christmas Sprinkle Cookies or a plate of homemade Gingerbread Cookies.
You can also browse my Easy Cookie Recipes when planning a larger holiday dessert table.
Can You Make This Dessert Ahead and Refrigerate It?
Yes! This dessert works beautifully as a make-ahead Christmas treat.
Prepare it up to 24 hours before serving. Keep it covered in the refrigerator, and add the candies and sprinkles at the last minute.
For leftovers, refrigerate the dessert promptly in an airtight container and aim to enjoy it within 3 days for the best texture.
Keep the refrigerator at 40°F or below. The FoodSafety.gov food safety guidelines recommend refrigerating perishable foods promptly and following the two-hour rule at room temperature.
I don’t recommend freezing this dessert. The gelatin and pudding layers can lose their smooth consistency after thawing.
Frequently Asked Questions About No-Bake Christmas Lush Dessert
Can I Make Christmas Lush Dessert the Night Before?
Absolutely. Prepare the complete dessert the previous evening and keep it refrigerated overnight. The chilling time helps the layers firm up, making slicing easier. Add your Christmas candies and sprinkles shortly before serving.
Why Is My Strawberry Gelatin Layer Runny?
The gelatin may need more refrigeration time. Follow the exact water measurements and allow the strawberry layer to set completely before spreading the pistachio pudding. The gelatin must feel firm, not sticky or liquid.
Can I Use Homemade Whipped Cream Instead of Whipped Topping?
You can try stabilized homemade whipped cream, but it may not hold its shape exactly like prepared whipped topping. For the most consistent results, follow the original recipe and use thawed whipped topping.
Can I Replace the Pistachio Pudding?
Yes. Instant vanilla or white chocolate pudding offers a delicious variation. However, you’ll lose the natural pale green appearance. You can add a small amount of green food coloring if you want to keep the Christmas color theme.
Final Thoughts: A Colorful Christmas Dessert Worth Sharing
What I love most about this No-Bake Christmas Lush Dessert is how a handful of familiar ingredients creates such a beautiful holiday treat.
You get a buttery crust, rich cream cheese, fruity strawberry gelatin, smooth pistachio pudding, and a fluffy whipped topping in every bite.
At EAT WELL WELL, I believe holiday cooking should bring people together rather than keep us busy in the kitchen all day.
Prepare this dessert ahead, give every layer time to chill, and enjoy sharing something sweet with the people you love.